|
Now that the overall design is determined, it's on to preparing the materials. For this ornament, a 1x10 pine board from the local home centre will provide enough wood for several ornaments. While the board is square and flat and dry when it arrives in the shop, it quickly loses all those great qualities when it's cut into its component parts. The photo below shows just how much movement happens when the board is ripped into strips. Left on its own for too much longer and they would twist and bend past the point of usability. 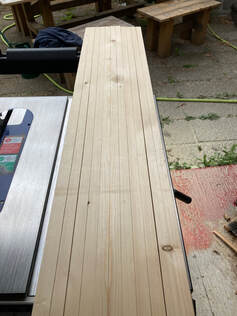 Now that the long cuts are done, it's time to crosscut them to the rough length that the finished ornament will be. For this, I use a shooting board that hooks on to the front edge of my bench. It has a fence that holds the pieces so I can make square cuts. A stop block is fixed so that each piece is the same length. 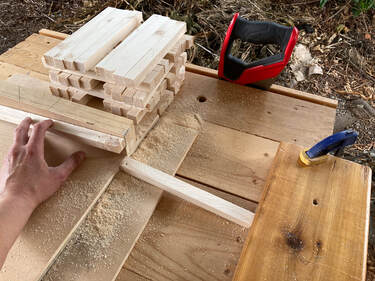 The board for this had very few knots in it, but there were still some that will need to be managed. I tried to orient the pieces so that knots wouldn't interfere with the turning. It's ideal to have the grain running in the same direction for all the pieces, but some had to be flipped so that the knots were out of the way.
Come back again for the next step in turning inside out ornaments.
0 Comments
Leave a Reply. |
The Maker and the MakingI'd like to say I'll let my work speak for itself. How can I do that when there's so much that can be said about it? Archives
October 2022
Categories |
 RSS Feed
